

Linear Drain Shower Trays
Thermopanel shower tray kit consists of a shower tray and a drainage system. Both components are coordinated with each other and form one unit.
For use with tiled floors only.

Designed for wet rooms and walk in showers, providing a tileable shower base which avoids the need for the traditional ‘step-in’ style white acrylic trays. The obvious benefit of using Thermopanel shower trays is that you are in complete control of the finish or your showering area, enabling you to choose your favourite floor tiles and even integrate underfloor heating within the installation
Key Features:
- Sleek & Modern Design – Provides a minimalist, contemporary look, ideal for wetrooms and walk-in showers.
- Pre-formed Gradient for Efficient Drainage – Designed with a built-in slope, ensuring fast and effective water flow.
- Multiple Grate Options – Available with different stainless steel grate designs, including wave, slot, and tile insert for a customized look.
- Low-Profile & Barrier-Free Access – Ideal for level-access wetroom installations, ensuring easy entry for all users, including wheelchair accessibility.
- Lightweight & Durable Construction – Made from high-quality materials for strength, stability, and long-lasting performance.
- Flexible Installation – Can be trimmed up to 50mm on each side for a perfect fit.
- Waterproof & Moisture-Resistant – Designed to prevent leaks, making it ideal for wetroom environments.
- Available in Various Sizes – Wide range of dimensions to suit different shower layouts and floor spaces.
- Easy to Install – Designed for quick and secure fitting, reducing installation time.
Perfect for Modern Wetrooms
Thermopanel Linear Drain Shower Trays offer a stylish, efficient, and practical solution for creating a seamless wetroom experience.

Shower Drain/Waste
Pipe Diameter:
50mm (inc 50mm to 40mm reducer)
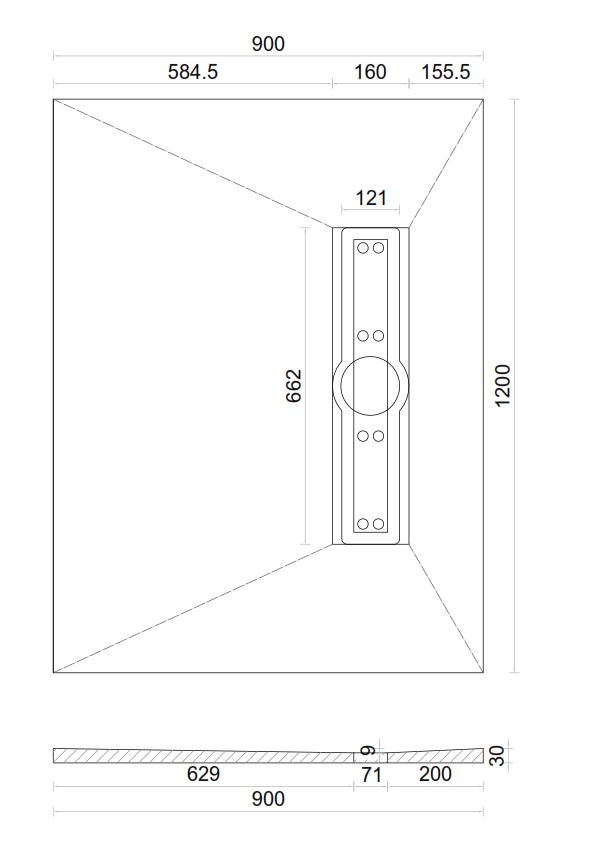
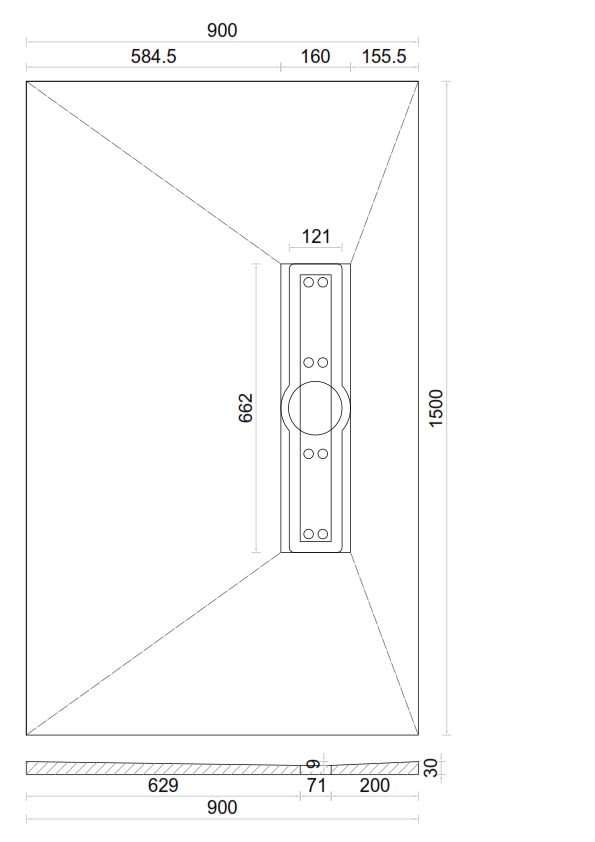
End Drain Position Dimensions:
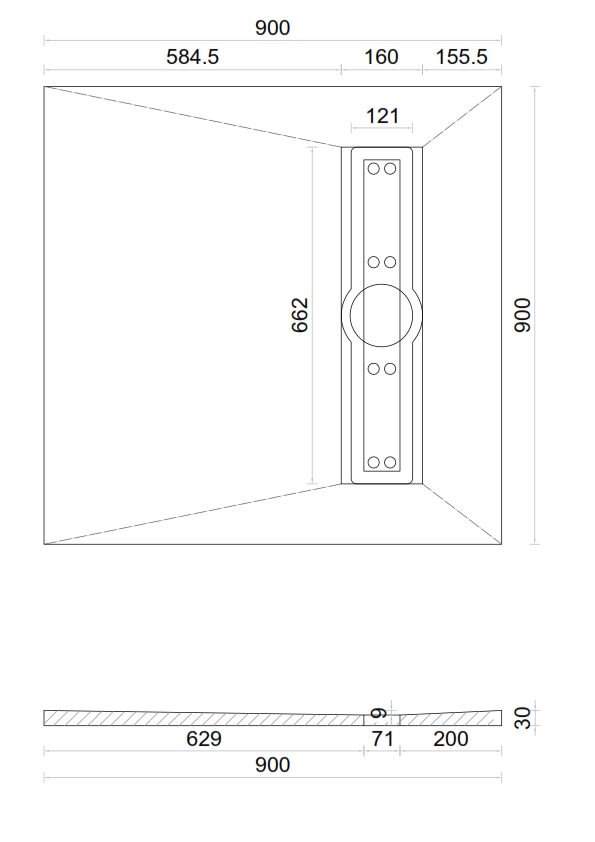
900 x 900 x 30mm
Product Code: SF0909LIN
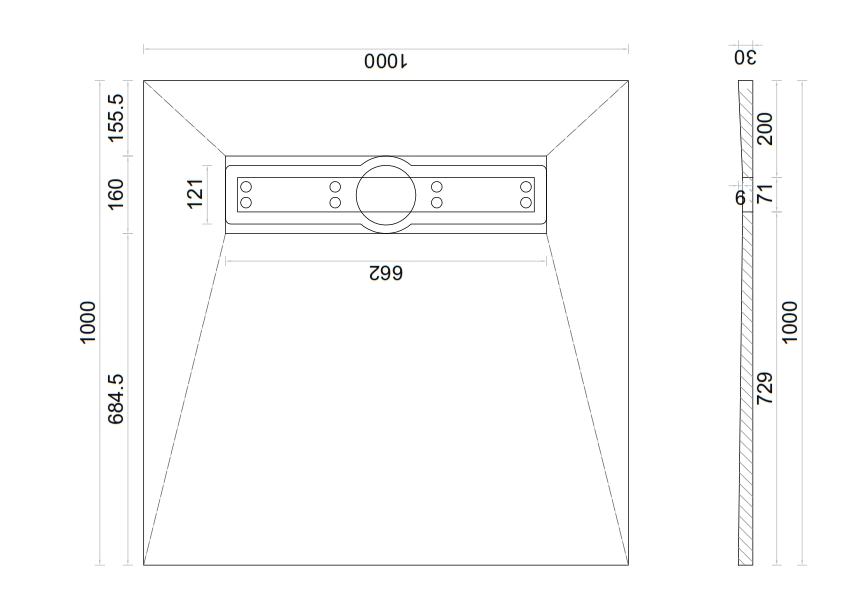
1000 x 1000 x 30mm
Product Code: SF1010LIN
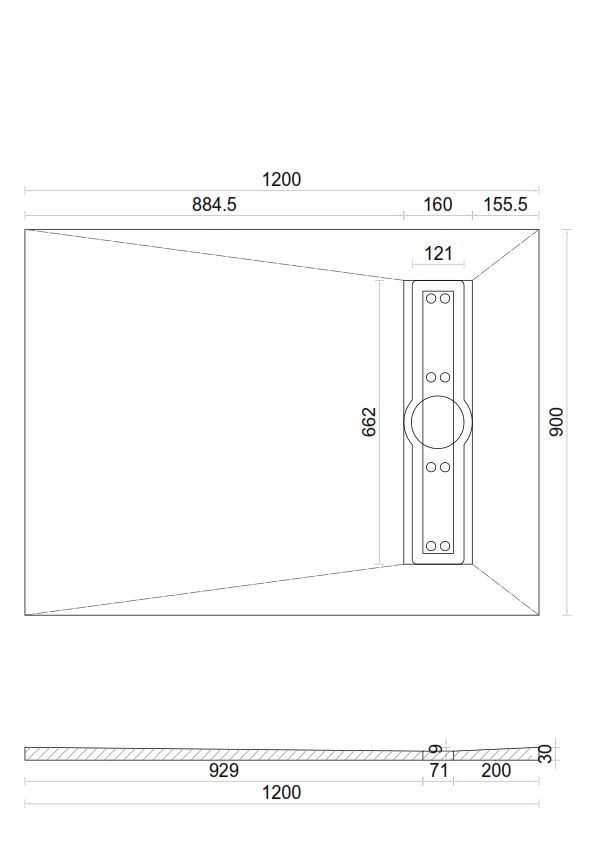
1200 x 900 x 30mm
Product Code: SF1209LIN
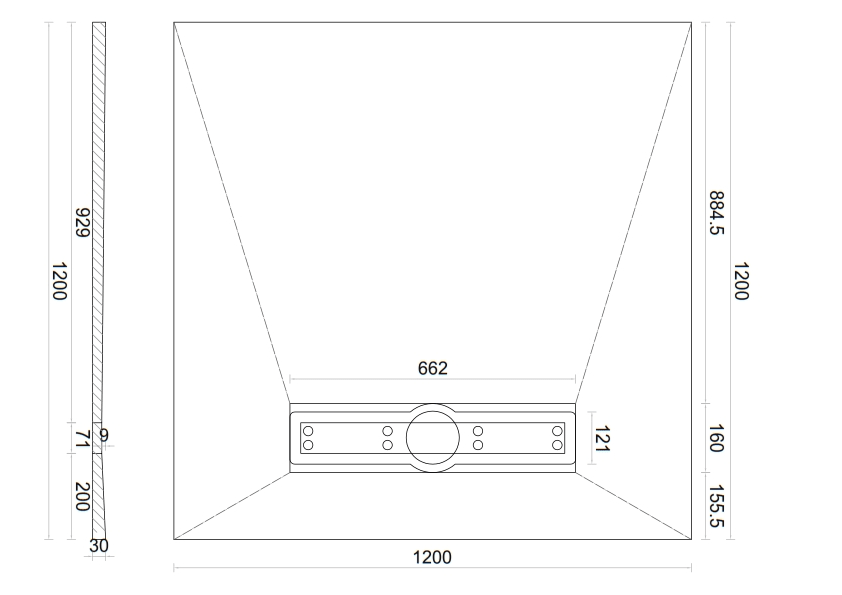
1200 x 1200 x 30mm
Product Code: SF1212LIN
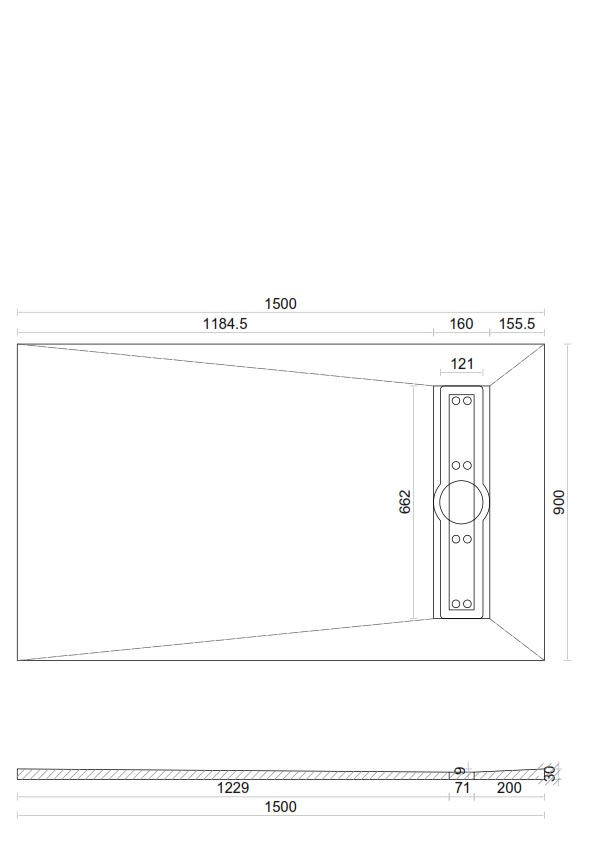
1500 x 900 x 30mm
Product Code: SF1509LIN

1800 x 900 x 30mm
Product Code: SF1809LIN
Side Drain Position Dimensions:
1200 x 900 x 30mm
Product Code: SF1209LIN90
1500 x 900 x 30mm
Product Code: SF1509LIN90

1800 x 900 x 30mm
Product Code: SF1809LIN90
Centre Drain Position Dimensions:

1200 x 900 x 30mm
Product Code: SF1209LINCEN

1500 x 900 x 30mm
Product Code: SF1509LINCEN

1800 x 900 x 30mm
Product Code: SF1809LINCEN
Installation Instructions For Linear Drain Shower Trays


